CREATE Gratitude
a date 2 create
A place for busy people to find inspiration, nurture their creative spirit, & CREATE the life they want to live. Make a date to CREATE today!
title description
A place for busy people to find inspiration, nurture their creative spirit, & CREATE the life they want to live. Make a date to CREATE today!
Labels
11.06.2011
10.15.2011
Chalkboard Paint: Wooden Boxes
CREATE Stylish & Functional Storage
My fabulous partner in life brought home these beauties from the grocery store (appreciating my love for aged wood, wooden boxes, & remembering that I recently mentioned something about wanting to create with wooden wine boxes)!
The store was selling them for $1.50 & $2!!!
The store was selling them for $1.50 & $2!!!
 |
| First, sand the side you will paint on to create a more smooth finish. I did not do this & really wish I did. |
 |
| Tape off the edges. |
 |
| Roll on the chalkboard paint. |
 |
| Let them sit out in the sun to dry. |
 |
| Peel off the tape when completely dry. |
 |
| Voila! Beautiful! These are just the larger ones. |
 |
| When you read the directions on the paint can it will give you instructions for "conditioning" the surface. It takes 3 days before you can really use the chalkboard surface. |
So far I have used them for:
~ organizing our linens in the linen closet
~ storing/carrying towels for the pool
~ storing library books
~ kids "projects"
~ mail
~ storing/organizing plates, napkins, & silverware to put out for parties
~ kids "projects"
~ storing/organizing plates, napkins, & silverware to put out for parties
Half-Marathon: I did it!!!!
CREATE the health and experiences you desire!
October 2, 2011
I reached my goal! I ran my first half-marathon!
Between a full-time job, kids, and life, it was tricky scheduling all the trainings. I made it work by running right after work & tried to run 4 days per week. My long run days were on Sundays which allowed me to take Mondays off - this just made life easier.
My goals were to finish, not finish last, and come in around 2'15". I finished in 2'11"!
 |
| My supporters checking in with me after the finish. |
8.29.2011
Dessert: Dragon Fruit
CREATE an easy, unique, & delicious dessert
Have you ever noticed the interesting exotic fruit at your local grocery store?
Well, from time to time we like to bring these home to try for dessert.
Today we have...
Dragon Fruit!
No doubt the name itself is quite exciting.
Of course, once we were home we had no idea how you're supposed to cut, eat, & serve this lovely pink food. So, we went to the internet. Below you will see all the steps.
 |
| 1st - Cut it in half |
 |
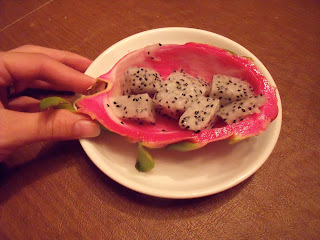
| Surprise! All white with little black seeds inside! We weren't expecting that! |
 |
| 2nd - Scoop out the flesh. |
8.28.2011
Half-Marathon: 34 days to go!
CREATE the fitness you want in your life!
34 days until the big day!
Life has become much busier lately, so getting all the runs in is getting much more challenging. I'm working on making the best use of my mornings & evenings to try & fit in the mileage.
This week is an easy week (helps with preventing injury).
Here is this week's training schedule:
Mon: Rest
Tues: 4mi, easy run
Wed: Rest
Thur: 4mi, easy run
Fri: 4mi, easy run
Sat: Rest
Sun: 4mi, easy run
8.26.2011
Festive Bunting
CREATE a festive bunting!
I love all the cute buntings I see everyone making online!
So I figured it was time for me to make one &, with a little adjusting, I am very happy with the results!
 |
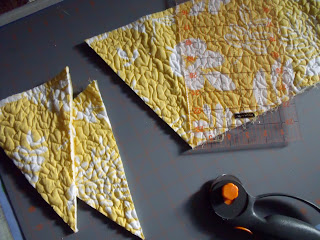
| Using fabrics I purchased at Goodwill (see the post here), I created my template & cut my first piece of fabric. |
 |
| Then I cut out a set with the same fabric. |
 |
| Using that first piece I measured & cut all the other pieces of fabric. |
 |
| This Hawaiian shirt made for some fun fabric! |
 |
| So... PLAN B I laid them out & clipped them onto a clothes line with clothes pins. Thank goodness I came up with this pretty quick because it was for a gathering THAT afternoon! |
 |
| Here are some pics of the final results! |
 |
| Happy bunting! |
Chalk board paint - mason jars
CREATE stylish & functional organization
Use chalkboard paint to create a write-upon label on Mason jars to use as storage!
 |
| Mason jars are available in various sizes & can be purchased by the case, making them very affordable. Find them in your grocery store or here. |
 |
| Tape off the area you'd like to paint. I wanted to use my blue paint tape as it is so easy to peel off but masking tape worked just as well. |
 |
| I used a small foam roller available here & chalkboard paint available here. |
Subscribe to:
Comments (Atom)


